How to Build a Cedar Log Home Kit: A Beginner's Step-by-Step Guide
A cedar log home kit arrives on a lorry in numbered bundles, with a set of drawings and the slightly unnerving promise that everything will fit together. It usually does — provided the ground beneath it is right, the first two courses are square, and you resist the urge to rush the corners.
The work is slower than most beginners expect, and more forgiving than they fear. Cedar is light enough to lift in manageable lengths, machines cleanly, and holds its shape well once dry. The two real enemies are impatience and water. A half-built wall that soaks up a fortnight of rain and is then sealed tight will cause problems you'll be chasing for years.
What arrives in a cedar log kit
Most kits contain wall logs cut and numbered to length, pre-formed corner joints, splines or gaskets that sit between courses, purlins, a ridge beam, rafters or trusses, structural screws, and assembly drawings. Better-specified kits add windows, doors, flooring and roof coverings.
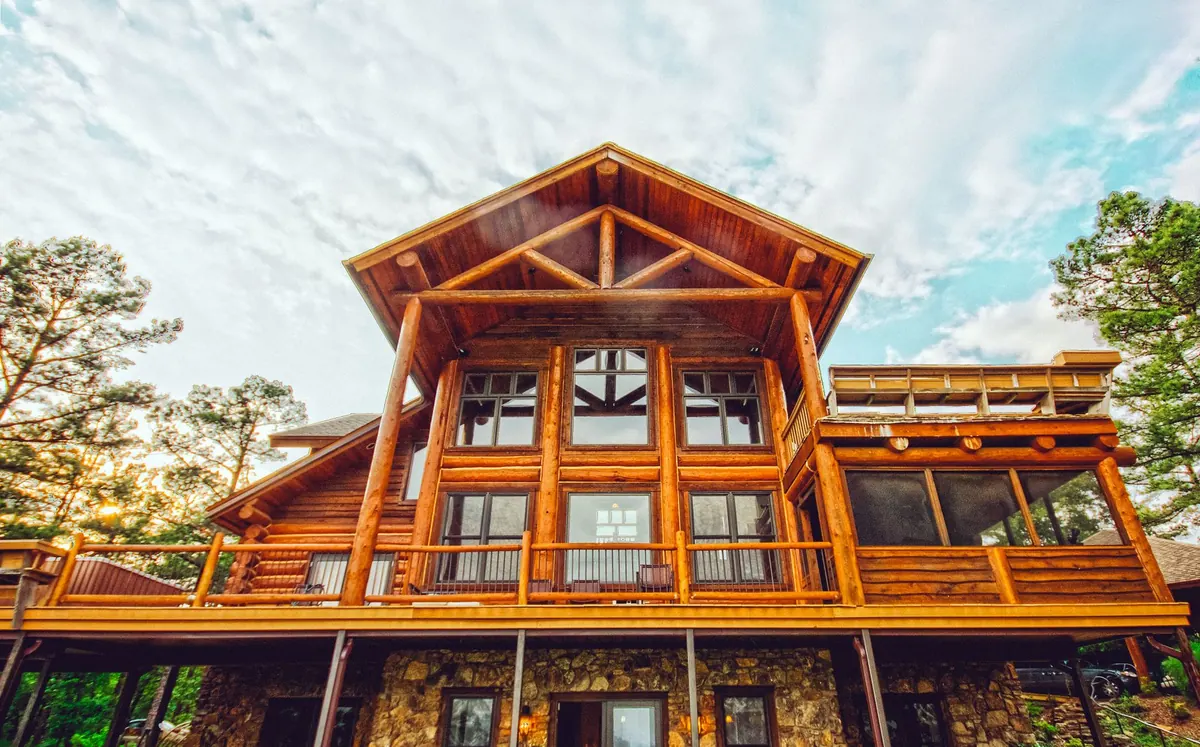
Western Red Cedar is the species most kits are cut from. It grows straight, resists rot and insect attack without chemical treatment, and moves relatively little as it dries — which matters when two hundred logs have to sit on top of one another. Left unfinished, it weathers to a soft silver-grey. Some people love that; others want to keep the honey colour, which means a maintenance schedule.
What is not in the crate: foundations, concrete, drainage, electrics, plumbing, scaffolding, labour, and often sealants and flashing. Budget for those separately, because they add up quickly.
Site preparation and foundations
Before the delivery date is fixed, confirm whether you need planning permission and building regulations approval. Outbuildings and annexes sometimes fall under permitted development in the UK, but the rules vary by area and change over time. Speak to your local planning authority early, and have a structural engineer or experienced groundworks contractor design the base for your specific soil and site. This is not a place to guess.
Cedar is durable, but it is not a foundation and it does not enjoy sitting in wet soil. Keep the bottom log well clear of ground level, with a damp-proof course beneath it and enough clearance for air to move.
- Strip foundations with a block plinth — the traditional approach on level ground.
- Reinforced raft or slab — useful where ground conditions are poor, with the first log set on a plinth above it.
- Screw piles or ground screws — quick and tidy on sloping or tree-heavy sites, and kinder to root systems.
- Existing hardstanding — rarely adequate without checking thickness, levels and drainage.
Two practical points people forget. First, dig service trenches for water, power and drainage before the base goes in; retro-fitting them under a finished cabin is miserable. Second, think about how the lorry will reach you. Kits are delivered on a flatbed with a crane, and it needs somewhere solid to stand.
When the timber lands, store it on bearers, clear of the ground, covered but not wrapped tightly. Air must circulate.
Tools you'll actually use
- Rubber or dead-blow mallet, plus hardwood offcuts to protect the log faces
- A 1200 mm spirit level, a laser level, chalk line and string
- Ratchet straps and heavy clamps for pulling courses tight
- Cordless drill and impact driver with long auger bits
- Sharp chainsaw, hand plane, chisels, pull saw for trimming
- A scaffold tower, scissor lift or telehandler — lifting heavy logs by hand stops being sensible above chest height
- Structural screws specified in the kit, sealant, gaskets, breather membrane and flashing tape
- Gloves, eye protection, and a dust mask; cedar dust is an irritant to plenty of people
Setting out and the first courses
Everything above the base inherits its mistakes. Set out the first course on the plinth, check that the diagonals match to within a few millimetres, and shim as needed. Bed the gasket or spline, check level along its full length, and fix down. Then do the same for the second course. These two will take an afternoon and will save you a fortnight.
Stacking the walls
Follow the numbering and work around the building in a consistent direction, keeping wall heights even. Running one wall five courses ahead of the others makes the corners almost impossible to close neatly.
Corner joints
Saddle-notch and Swedish-cope corners should drop together with a firm push and a few taps through an offcut. If a joint needs force, something is binding — find it rather than hammering it home, because cedar dents easily and grain tears on impact.
Settling allowances
Logs continue to shrink as they dry, so the building will settle. That means threaded settling rods rather than rigid bolts, slip joints above windows and doors, and fixings that allow vertical movement where logs meet posts or staircases. Keep the drawings to hand for these details; they are the difference between a tight cabin and cracked seals.
Stop each day with the top course covered. A tarp over the walls costs minutes and prevents a great deal of staining and swelling.
Openings, roof and weathertight
Cut window and door openings after the walls are stacked, marking from a single datum line rather than measuring each one separately. Fit trimmer logs or studs at the sides, then allow for settlement above.
Roof structure follows the kit's sequence: purlins, ridge, then rafters or trusses. Get the ridge straight and the wall plates level, and the rest goes smoothly. Once the roof covering, flashing and guttering are on, the building changes character — it stops being a pile of timber and starts being a house.
Run services in chases or behind a service wall, not by notching structural logs. For electrics, gas and drainage work in the UK, use a qualified trade and get the relevant certification.
Finishing and protecting cedar
Cedar left bare will silver gracefully, but it will also absorb water and show every splash mark. If you want to keep the colour, use a breathable, UV-blocking stain rather than a film-forming varnish, which traps moisture and peels. Test on an offcut first, because cedar takes finish unevenly. Pay extra attention to end grain, cut ends and anywhere water sits. Expect to recoat every few years on exposed faces.
After the first winter, walk the building with a spanner and a tube of sealant. Check settling rods, adjust as the logs dry down, and re-seal around openings.
Keeping the build on track
Plan on a realistic pace: a small cabin shell is a matter of weeks for a competent crew, but a first-time self-build with a couple of helpers will take considerably longer, and that is fine. Build in a dry spell if you can, keep the drawings in a plastic sleeve, and photograph every course before you cover it — you will want those pictures when you come to fix a cabinet or run a cable later.
Know your limits. Foundations, structural calculations, roofing at height and regulated services are worth paying professionals for. Do those well and the stacking, which is the part most beginners actually enjoy, will go far more easily.
Photo: Chris G / Pexels
Cedar Shingles vs. Cedar Shakes: Which Roof or Wall Covering Should You Choose?
Sawn shingles and split shakes both come from western red cedar, but they differ in cut, thickness, look...
Woodworking with Cedar: Projects, Joinery and Finishing Tips for Beginners
A practical beginner's guide to working with cedar: what makes it different, projects worth building,...
About Us